Body
Follow the steps below to create a News Post within your departments MyFramingham (AKA SharePoint) site.
Note: ITS has an FSU branded template that you can request be applied to your site. Please reach out using this service or email it@framingham.edu if you would like it applied. A copy of the template and how it would appear in an email is attached to this article.
Click on the links below to jump to the following section.
- Go To Your Department's Site
- Start a New News Post
- Choose a Template
- Add a Title and Header Image
- Add and Customize Web Parts
- Adjust the Page Layout
- Run the Accessibility Assistant
- Save, Preview, and Publish
- How to Get More Help
1. Go To Your Department's Site
Navigate to your department's live MyFramingham site where you want to publish the news. If you don't have the link saved, you can navigate to my.framingham.edu and use the global navigation under the search bar to find your department.

If your department doesn't have a site, one will need to be created by IT and the content added and managed by someone in your department. If your department has a site created and it is not live, meaning it is not available to the campus community, the site will need to be completed by someone in your department and a readiness review will need to be performed by IT. Please submit a ticket here if you need to set up a site for your department or if your site is complete for a readiness review.
2. Start a New News Post
There are two common ways to begin:
Option A: From the New menu
- Select New in the top-left corner.
- Choose News post.

Option B: From the site home page if you have a News web part in place
- Scroll to the News section.
- Select + Add or Add news post.

Either option opens the modern page editor with templates to choose from.
3. Choose a Template
SharePoint offers several starter templates such as:
- Blank (next to the "Search for a template" field)
- Visual topic introduction
- Topic overview
- Monthly news update
- Product News
- Article
- In-Depth Article
- Resources
- Training hub
- Photo showcases

Select a template that matches the type of content you’re creating. You can always modify the layout later.
Note: ITS has an FSU branded template that you can request be applied to your site. Please reach out using this service or email it@framingham.edu if you would like it applied. A copy of the template and how it would appear in an email is attached to this article.
4. Add a Title and Header Image
At the top of your new post:
- Type your Title. You may also remove yourself as the author if you wish to not appear to the readers.
- Add or change the header image (recommended)

Tip:
Use high-quality, wide screen images for the best impact. SharePoint provides free stock images, web search options, and the ability to upload your own.
5. Add and Customize Web Parts
Web parts are the building blocks of your post.
Hover your mouse over the column in the section where you want to add the web part, and click the gray + button that appears to add components such as:
- Text
- Image
- People
- Button
- Call to action
- Quick links
- Divider

You may also use the Toolbox to click and drag web parts to where you want them on the page

Each web part includes formatting options like layout, alignment, backgrounds, and more. This Microsoft article has a list of all the web parts you can use and how to apply them.
6. Adjust the Page Layout
To adjust the sections on your page, click the white space next to your web part and click Edit Properties on the toolbar that appears. From here you can:
- Switch between 1-, 2-, 3-column, or full-width layouts
- Make the section collapsible
- Apply background shading
This gives your article structure and makes it more visually appealing.

You can add new sections by using the black + icon throughout your page. You will find the same settings when you add a section.

7. Run the Accessibility Assistant
The SharePoint Pages Authoring Accessibility Assistant is a tool designed to help ensure that SharePoint pages meet accessibility standards. This tool provides checks and brief guidance to ensure pages are inclusive and accessible to a broad audience.
-
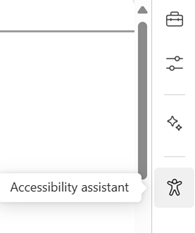
While in Edit mode, open the right toolbar.
-
Click on Accessibility Assistant to initiate the scan.
Check marks show where the content passed all checks where numbers show where you have an opportunity to improve the accessibility of your page.
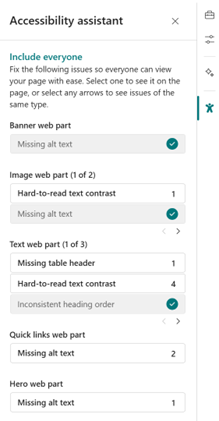
Accessibility Assistant works today on the following page elements:
- Text web part
- Image web part
- Quick links web part
- Hero web part
- Banner web part
Accessibility Assistant performs below checks:
- Page structure (e.g. inconsistent heading order)
- Missing alt-text
- Blank links
- Tables (e.g. missing table header)
- Color and contrast (hard-to-read text contrast)
To resolve an issue:
- Click on the issue card to open the content pane or locate to the issue area on canvas for that specific web part content.
- Follow the recommendations or use the provided options to fix the accessibility issue.
 Note: Clicking 'I fixed it' means the color contrast issue has been marked as resolved and will not be detected again during this session. Clicking 'Ignore' skips the issue and returns to the previous state.
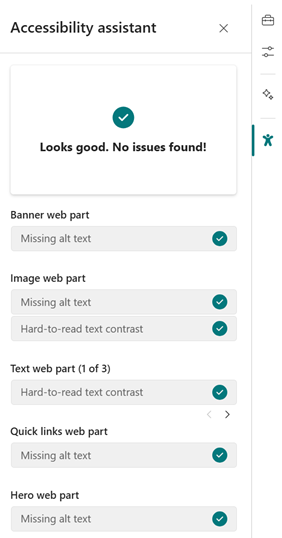
- Once the issue is resolved, the counter for remaining issues will update, and the focus will move to the next instance of violation.
- When there’s no issue detected or all issues have been fixed, the ‘Looks good’ messaging will show up.
8. Save, Preview, and Publish
At the top of the page editor, you’ll see options:
- Save as draft – if you need to come back later
- Preview – to test mobile and desktop layout
- Publish – when you’re ready to share it

When you publish, SharePoint may also give the option to Send to Email.
If you want to send the News post to distribution lists such as FacStaff or AllStudents, it is recommended to send as an email to your department's email that is capable to send to those groups. Once it arrives to that inbox, use the Forward button, remove the forwarding information from the subject and body, then add the distribution lists. This is the recommended method because once you Send to Email from SharePoint, there is no way to see sent information or to see if the email got stuck.
How can I get more help?
If you need assistance creating your news post, we're happy to walk you through it. Ask any questions or request a meeting using this service to put in a ticket. You may also email it@framingham.edu
Note: ITS has an FSU branded template that you can request be applied to your site. Please reach out using this service or email it@framingham.edu if you would like it applied. A copy of the template and how it would appear in an email is attached to this article.
We welcome all questions!