Overview
In this article, you will learn how to upload your video files to create new, individual Panopto videos either via drag and drop or the Create button. Note: To upload multiple video and presentation files that you want to combine and turn into one video, you will need to use the Build a session feature in Panopto. For more information, visit How to Use the Build a Session Feature.
1. Uploading Using the Create Button
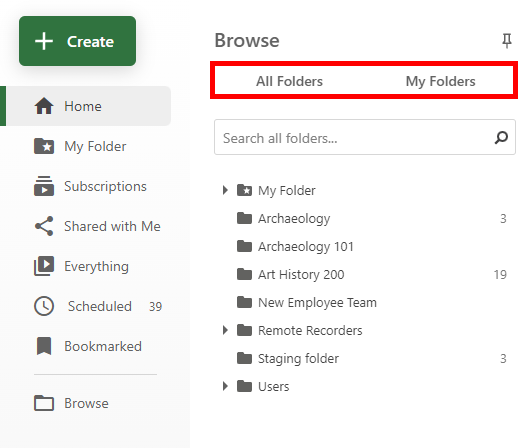
1.1. Select Browse from the left-hand navigation on your Panopto site, select All Folders or My Folders on the left-hand column, and then locate and select the folder to which you want to record your video:
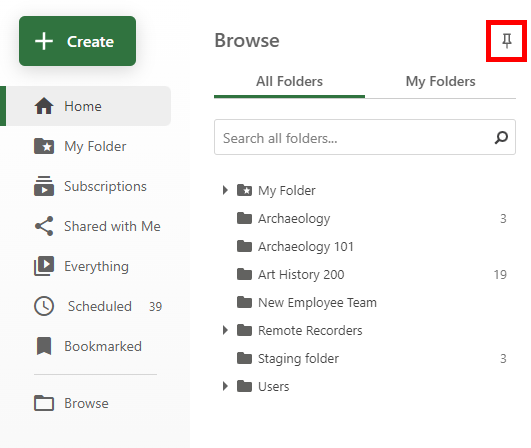
1.1.a. To keep the Browse menu open, select the pushpin icon in the top right corner. This will pin the menu open on the page, and allow you to browse through different folders without opening the Browse menu each time. Once pinned, the pushpin will appear dark grey and filled in. To unpin the menu, simply select it once more.
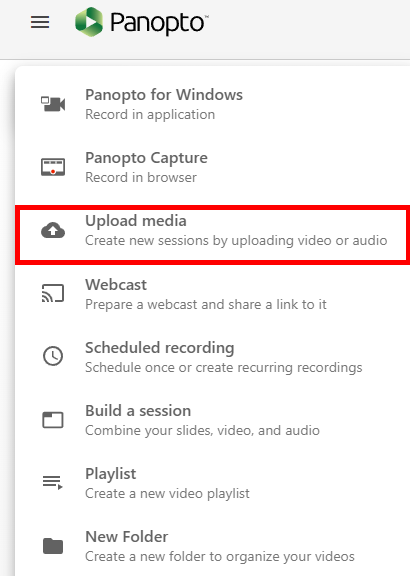
1.2. After choosing your folder, click the + Create option and then select Upload Media:
1.3. In the window that appears, drag and drop video or audio files into the box, or select the box to locate the audio/video files you want to upload. Note: You can drop multiple files into the video upload window at one time to create multiple sessions.
1.4. The uploading process may take a few moments to finish, based on the size and amount of files. Note: Once the upload process is complete, you can close the window. The video sessions will be processed for playback in Panopto. After processing, you will be able to edit your videos. You will receive an email notification when the sessions are ready to view or edit. There are certain factors, such as bitrate, aspect ratio, file size, and video length, which can impact the time it takes for the video to process. For supported media file types, see Learn About Supported Media File Types for Uploading. To learn how to edit your videos, please visit: How to Edit a Video.
2. Uploading Using Drag and Drop
Note: Currently, the new drag and drop experience will be disabled if there is any text in the site-wide setting Site Customization - Upload Policy. In this case, Creators will only be able to upload content via the Create button, and the upload policy text will appear at the top of the Add files window, referenced in step 1.3., above, where they upload video content.
2.1. Open the Panopto folder to which you want to upload files. Drag and drop the files directly from your machine into the Panopto folder. As the video(s) upload, a status window will appear in the lower right-hand corner. When the video(s) are done uploading, a green check will appear next to their title in this window. Note: After uploading your video, your Panopto video will process as it normally would.